Mo 'Poxy's Chesapeake 17 Kayak Construction
Deck Installation
The deck is made from 4mm okoume. The wood is laid over the hull, marked and rough-cut larger than needed. The hatch and cockpit openings are marked and rough-cut smaller than final. It helps to carefully note the boat centerline, on the deck, so that the hatch and cockpit openings are centered in the final installation.
Before installing, the underside of the deck should receive two coats of epoxy. I avoid sanding between coats by applying the second coat as soon as the first coat is tack-free. The deck should be installed while the second coat of epoxy is un-cured, to ensure a good bond between the deck and the sheer clamps.
Thickened epoxy is spread on the sheer clamps and the first deck half is positioned on the boat. I use tie-down straps for force the deck to the curves of the bulkheads, deck beam and sheer clamps. Then, as the plans specify, I nail the deck to the sheer clamps with bronze ring nails. I space my ring nails very evenly and drive them very neatly since they will be exposed on my finished deck.
A butt-joint is formed where the 2 deck-halves meet at the cockpit and the second deck half is installed in the same manner as the first.
 |
| Deck lined up for installation |
 |
| Deck lined up for installation |
 |
| Butt joint at front bulkhead |
Coaming
The coaming is the lip around the cockpit opening. The coaming is not just a spray lip. It is a structural component to strengthen the deck around the opening. But its biggest role is to support the paddler weight during entry and exit.
The coaming is constructed by laminating several layers of 4mm or 6mm okoume in-place. These pieces were cut when preparing materials. This step takes lots of clamps and lots of patience.
The cockpit opening will not be cut to its final shape until all coaming layers are installed. Then, the coaming and the deck are cut at the same time, for a perfect cockpit opening.
This is a good time to mask the deck to protect the deck from sanding and epoxy drips.
After cutting, I sand the coaming smooth all around.
I avoid leaving end-grain of plywood exposed because it tends to delaminate if exposed. I prefer to seal it with epoxy and cover it with fiberglass. Here I apply epoxy-saturated fiberglass to the coaming top and inside faces.
Since the coaming will be painted, I fill the weave of the fiberglass with silica-thickened epoxy.
 |
| Clamps on coaming |
 |
| Clamps removed after epoxy has cured |
 |
| Sanding coaming layers flush with each other |
 |
| Glassing the coaming |
 |
| Completed coaming |
Install hatch trim
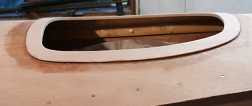
Although not specified in the plans, I install a piece of trim around the hatch opening. This trim strengthens the deck in the area of the hatch opening, provides a small amount of protection against deck wash and it is also somewhat attractive.
This is made from a piece of 4mm okoume that is cut to the same size as the hatch cover. The outside edges are rounded and sanded then the trim is glue-laminated to the deck.
The inside edge of the trim is cut smaller than final. After the epoxy has cured, the inside edge of the trim and the deck are cut to the final size.
 |
| Hatch trim clamped |
 |
| Cutting hatch trim to final size |
 |
| Completed hatch trim |
Build hatch covers
The two hatch covers are constructed by cutting curved hatch cover beams, then gluing the beams, to the hatch covers, with thickened epoxy fillets.
This step, and several of the following steps, keep me busy between coaming steps.
 |
| Gluing hatch cover to beams |
 |
| Hatch cover ready for coating |
Rudder cable deck penetrations
If you install a rudder, you must drill a hole through the deck for the control cables to penetrate. I re-inforce the hole with these fancy oak cable guides.
Deck surface coating
After all of the miscellaneous wood pieces are installed, the deck can be epoxy coated. Note that the deck edge has not yet been trimmed flush with the side panels. I leave the deck edge overhang so that epoxy drips cannot run down the side panels.
After the last coat of epoxy cures, I trim the deck edges flush with the side panels. I used my hand plane to plane the deck edges very close to the panels. Then, I sanded the deck edges to be perfectly flush with the side panels.
This is a good time to epoxy coat both sides of the hatch covers. Two coats of epoxy is usually enough.
 |
| Epoxy-coated deck |
 |
| Epoxy-coated hatch covers |


No comments:
Post a Comment
Note: Only a member of this blog may post a comment.