Mo 'Poxy's Chesapeake 17 Kayak Construction
Hull Assembly
Gluing the sheer clamps to the side panels
Be sure to decide which face of the side panels will be inside, and which will be outside, prior to gluing the sheer clamp to the inside. Also remember that the 2 side panels with sheer clamps installed are not the same, they are actually mirror images of each other.
Multiple layers can be glued, using only one set of clamps, by stacking the pieces for clamping. Always separate the layers with wax paper or plastic sheeting, otherwise all the layers will be glued together into one useless wasteful mess. In a single session, I once glued 4 sheer clamps onto 4 side panels for making 2 boats.
The sheer clamp pieces are glued "proud" onto the side panels (that is - overhanging the top off the side panels further than necessary). In a later step during hull assembly, the sheer clamps are shaved to their final dimension.
 |
| Gluing sheer clamps to side panels |
Fiberglassing and epoxying the interior cockpit area of the bottom panels.
The plans do not specify this step. I added this to provide greater strength to the hull bottom in this area where sandy feet cause abrasion and stepping in and out concentrates loads on the hull panels.
I use System 3 epoxy for all my boat epoxy coating. The fiberglass provided by System 3 is transparent when saturated with epoxy. This exposes the beauty of the wood. Not all fiberglass is transparent when saturated.
Before epoxy, I layout and cut the fiberglass over-sized and thumb-tack it in place. I have learned to apply minimum amount of un-thickened epoxy using a foam roller then flatten and spread with a window squeegee. This uses minimal epoxy. hen I use too much epoxy, the fiberglass floats in the epoxy and results in lumpy waves in the fiberglass. Using minimal epoxy eliminates floating and waves. After a bit of curing, subsequent coats of epoxy are applied to fill the weave of the fiberglass and leave a smooth surface.
Some epoxy manufacturers recommend pre-coating the wood prior with epoxy, allowing it to cure, then sanding prior to fiberglass. This is to seal the wood. The theory is that without pre-coating, the wood will soak the epoxy out of the fiberglass and "starve" the fiberglass of epoxy. I've pre-coated then sanded many times. Then I learned to pre-coat and apply epoxy as soon as the pre-coat is tack-free, to avoid sanding. Then I learned not to pre-coat at all. I no longer bother to pre-coat and have never experienced starved fiberglass. The bond between the wood and epoxy-saturated fiberglass is far better without pre-coating.
NOTE: At the time that I built this kayak, only "blushing" epoxies were available. Sanding between coats of epoxy was required to remove the blush and ensure a good bond between coats. Nowadays, non-blushing epoxies are available, eliminating the need for sanding between coats.
 |
| 'glassing the interior bottom panels in the cockpit area |
Drilling the stitch holes in the hull panels and stitching the keel, stern and stem
Although drilling does not take long, stacking the panels for drilling 2 at a time can save a little time and aligns the stitch holes.
Stitching the keel at this point, while the bottom panels are "sandwiched" together, aligns the two bottom panels perfectly. Be sure to decide which face is inside and which is outside before stitching the "sandwich".
I used 18 gauge copper wire for stitching. I've tried thinner wire (20ga) but it broke too often.
 |
| Stitching the keel |
 |
| Stitching the stem |
 |
| Stitching the stern |
Stitching the bottom panels to the side panels
Spread the bottom panels and lay them on the side panels for stitching.
The bow and stern of the bottom panels may not exactly mate with the bow and stern of the side panels. When they do not mate perfectly, I lay the bottom so that the bow and stern are equally distant from the bow and stern of the sides.
 |
| Bottom panels layed on side panels |
Loosely stitch the bottoms to the sides.
I start amidship and stitch evenly on each side (4 to 6 stitches on one side then 4 to 6 on the other, so on and so forth) working a little towards the bow, then a little towards the stern, until complete.
Tie-wire twist pliers are pliers that can be clamped to the wire loop pair, then a knob on the pliers is pulled to twist the pliers, thus twisting the wires together, rapidly.
 |
| Stitching side panels to bottom panels |
Tighten all of the completed hull stitches.
I "snug" all of the wires, but, before final tightening, I sight down the keel line and I can see humps (where the keel line is un-naturally high) and dips (where the keel is un-naturally low). To remove dips, I insert popsicle sticks in the keel, between the two bottom panels. This forces the keel joint to open and causes the keel to move up a bit, removing the dip. The popsicle sticks must be flush with the inside so they do not get in the way of future epoxy fillets. To remove humps, I will sand this keel at a later step.
Tie-wire twist pliers are a great help and are low-cost. However, for final tightening, they tend to break the wires rather than "cinch them down". So, I use standard pliers for final tightening twist.
 |
| Completed hull stitching |
Creating the hull shape
Turn the boat over, install a temporary spreader to establish the plan-specified beam width and "wind" the boat.
The plans describe where to locate the spreader and the proper boat beam at that location.
"Winding" is simple. Just twist the boat to a symmetrical shape. The plans explain how to wind using visual references. I use my level instead of my eyes.
 |
| Spreading and winding the hull |
Fillet and tape the interior joints (1 keel and 2 chines)
Fillets are thickened epoxy that is spread into the inside corners of the joints, to create a smooth concave surface for the fiberglass tape. To thicken epoxy, I first mix epoxy and hardener, then I add silica powder until the mixture resembles runny mayonnaise, then I add wood flour until the mixture is just a little softer than peanut butter. Silica and wood flour are available from System 3 .
Getting the thickened epoxy from the mixing pot, into the joints, is laborious unless you use something like pastry bags, ZipLoc bags or a caulk gun. I prefer ZipLoc freezer bags because they are cheap, disposable, no clean-up and the seams have never failed on me. I turn the ZipLoc part-way inside out, leaving a pocket in one corner of the bag. I pour the thickened epoxy mixture into the corner pocket, turn the bag inside-in, squeeze the air out, zip the bag shut, then use scissors to snip off about 1/4-inch of the bag corner. I then squeeze the thickened epoxy out of the cut corner of the bag, into the joints.
When laying the thickened epoxy into the joints, I form a bead that is a bit smaller diameter than a pencil, for the length of the joint. Then, I round the thickened epoxy into a concave shape using rubber kitchen spatulas. Two or 3 spatulas of various radii (cut to shape with scissors) are needed to accommodate the variation in joints along the length of the boat.
When done, wipe the uncured epoxy off of the spatulas nd throw the ZipLoc away.
Fiberglass tape is thin strip fiberglass ( 3 to 6 inches wide) on rolls. I use 6oz (weighs 6 ounces per square foot) fiberglass tape that is 3-inches wide. I place the fiberglass on the still-soft fillet, then saturate the fiberglass with un-thickened epoxy. I use a disposable paint brush to apply the epoxy to the tape. I prefer to place the tape while the fillet is un-cured and soft. This avoids the need for future sanding, it creates a strong chemical bond between the tape and fillet, and it permits hand shaping of the soft fillet under the tape. Unfortunately, this also requires a long session with epoxy.
 |
| Taping the keel |
 |
| Completed taping of keel, stem, stern and chines |
Coat the entire interior with epoxy
This seals the inside surface of the hull. This epoxy should be applied before the tape cures, to avoid the need for sanding when using blushing epoxies. Two coats are usual, and I apply the second coat as soon as the first coat is tack-free, to avoid sanding.
Before applying the second coat, I use a Stanley ShurForm to shave off rough edges of fiberglass, to smooth sharp spots and to remove goobers of epoxy. You will be unable to reach parts of this interior in the future. So, be sure to remove all sharp spots now, so that float bags and dry bags are not ripped or punctured.
 |
| Coated interior |
What's up with sanding and avoiding sanding epoxy?
As blushing epoxy cures, wax forms on the surface as a result of chemical reaction. This wax will inhibit bonding with future epoxy. Fortunately, the wax forms late in the curing process. If you apply epoxy, then wait a long time (some say 72 hours) then the wax has formed. In this case, you must sand to remove the wax before applying more epoxy. Epoxy is very hard to sand. However, if you do not wait, and you apply the next layer of epoxy immediately (some say less than 72 hours, some say less then 24 hours, I say as soon as the first coat is tack-free), the wax does not form between epoxy layers. It only forms on the final layer that is exposed to air.
Before you sand, wash the cured-epoxy surface with warm water. The wax is water soluble and most will come off with water. You must still sand to remove the little bit of wax left in the surface. However, by washing first, you avoid gobs of wax clogging your sand paper.
Non-blushing epoxies are available that eliminate the need for sanding all together.
The Globs
The plans recommend that, after the deck is installed, you stand the boat on end and pour some epoxy into the hull so that if fills up the ends. This is done for both the bow and stern. The end pours provide strength to the hull and stern points and provide a solid area to install lift handles, loops and/or rudder.
I do my end pours slightly different. After fillet and taping the chines and keel, before the deck is installed, I install a dam, with scrap 4mm okoume. Then I pack behind the dam with thickened epoxy. This is a good place to put extra epoxy that is left over after other epoxy work.
These globs of epoxy will provide structural mass for the future bow and stern lifting loops.
 |
| Glob in the stem |
Bulkheads
Bulkheads are walls within the hull. They add structural strength plus they create a water-tight barrier. Two bulkheads are installed to divide the kayak into 3 compartments.
The bulkheads are rough-cut from 6mm (¼-inch) marine plywood. They are then custom shaped to match the hull at the location specified in the plans. The tops are cut to the deck radius that is also specified in the plans. The bulkheads are glued in to the hull with epoxy fillets. To avoid sanding, I install my bulkheads as soon as the final interior hull coating is tack-free. As soon as the bulkhead fillets have strength, I coat the bulkheads and fillets with un-thickened epoxy.
 |
| Bulkhead |
Deckbeams
Remember those deck beam strips that were cut during material preparation? Those are laminated together, in a curve, to create the deck beam. The 5 strips are "buttered" with epoxy, stacked on top of each other, wrapped in wax paper (so they do not get glued to the jig) and clamped on the radius jig.
After the epoxy cures, the beam is removed, cleaned and sanded to create the deck beam.
The deck beam is glued and screwed into the sheer clamps at the location specified on the plans.
 |
| Deck beam layers |
 |
| Gluing jig |
 |
| Completed deck beam |
 |
| Deck beam installation |
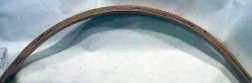
Shape (radius) the sheer clamps
When the sheer clamp was glued to the side panels, it was glued "proud", or higher than needed. Now it is time to shave it down to its final height and shape. The sheer clamp is shaved or sanded (I use a hand plane) to match the deck radius and create a gluing and nailing surface for deck installation. The sheer clamp should end flush with the top of the side panels and mate with the bulkheads and deck beam.
A radius guide, such as scrap plywood cut to the radius of the deck, provides guidance on where to shave, what angle to shave and how deep to shave. I usually take my time, play music loudly on the shop stereo and shave little bits at a time, frequently checking with the radius guide.
 |
| Shaping the sheer clamps |
Foot Brace Nailer
To avoid penetrating the deck with future foot brace screws, I install nailers on the inside of the side panels, at the location where the foot brace rails are to be installed. A few layers of 4mm okoume, in 1½-inch x 17-inch strips, laminated in-place, create a solid section of wood. The adjustable foot brace rails can then be mounted from the inside with numerous wood screws, without unsightly penetration of the hull.
It helps to install the foot brace rails at this time, rather than after the deck is installed.
 |
| Foot brace nailer |
 |
| Time to install the deck |
No comments:
Post a Comment
Note: Only a member of this blog may post a comment.